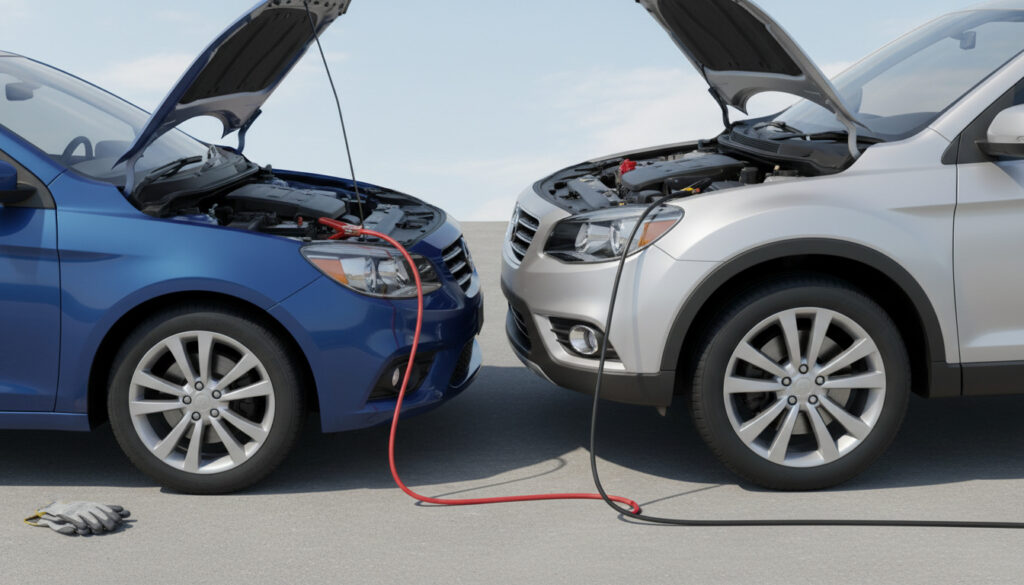
Jump Starting a Car – Safe Step-by-Step Guide
A dead battery strands thousands of drivers annually, often at the least convenient moments. Understanding the proper sequence for jump starting a car prevents costly damage to sensitive electronics and avoids potential injury from explosive hydrogen gas. This guide covers the safest methods for traditional cable jumps and modern alternatives based on current automotive safety standards.
The procedure requires precision. Connecting cables in the wrong order or to the wrong terminals can destroy onboard computers, melt wiring, or trigger battery explosions. How to Jump Start a Car with Leads – Step-by-Step Safety Guide provides additional visual reference, but the fundamentals remain consistent across most gasoline-powered vehicles.
While the success rate for reviving weak batteries approaches 80-90%, completely discharged or damaged units may require professional replacement. The following sections detail preparation, execution, and troubleshooting based on manufacturer guidelines and automotive safety research.
How Do You Jump Start a Car Step by Step?
- Always connect red clamps to positive terminals first
- Ground the final black clamp to unpainted metal, not the battery negative
- Let the donor car idle 1-2 minutes before attempting the start
- Drive for 30 minutes after a successful jump to recharge via alternator
- Never connect mismatched voltage systems (avoid 6V with 12V)
- Remove jewelry and wear eye protection before handling cables
- Inspect for cracks, leaks, or frozen batteries before attempting
| Step | Action | Caution |
|---|---|---|
| 1 | Park vehicles close but not touching | Both engines off, parking brakes engaged |
| 2 | Connect red to dead battery positive (+) | Ensure secure connection to terminal |
| 3 | Connect red to good battery positive (+) | Cables must not touch metal or each other |
| 4 | Connect black to good battery negative (-) | Verify polarity before proceeding |
| 5 | Connect black to unpainted metal on dead car | 1 foot from battery, bolt or bracket only |
| 6 | Start donor car, idle 1-2 minutes | Clear hood area of people and objects |
| 7 | Attempt to start dead vehicle | May require multiple attempts |
| 8 | Disconnect in reverse order | Black from ground first, then negatives, then reds |
Preparation determines success. Gather jumper cables 10-12 feet long with heavy-gauge wiring, safety gloves, and eye protection. Position the working vehicle so batteries align without the cars touching. Engage parking brakes on both vehicles, shift automatic transmissions to park and manuals to neutral, and turn off all accessories including lights and radios.
Verify both batteries share the same voltage—typically 12V for modern automobiles. Consult the state-of-charge indicators if present; green or red indicates sufficient charge while black or clear suggests deep discharge. Locate the batteries, noting that some manufacturers place them under covers or provide remote terminals.
Connection sequence follows a strict order to minimize sparking near the battery. Attach the first red clamp to the dead battery’s positive terminal, then the second red to the good battery’s positive. Connect one black clamp to the good battery’s negative terminal. The final black clamp attaches to an unpainted metal bolt or bracket on the dead car’s engine block, positioned at least one foot from the battery to prevent igniting hydrogen gas.
Start the donor vehicle and allow it to idle for one to two minutes to transfer initial charge. Attempt to start the disabled car; it may require several tries. If successful, drive the vehicle for thirty minutes to allow the alternator to recharge the battery, as noted by Honda maintenance guidelines.
What Are the Safety Precautions Before Jump Starting?
Essential Safety Equipment
Battery explosions cause approximately 75% of jump-start related eye injuries. Remove all jewelry including rings and watches before handling cables, as conductive metal can arc across terminals causing severe burns. Wear protective goggles or safety glasses and insulated gloves.
Battery Condition Assessment
Inspect the dead battery thoroughly before proceeding. Do not attempt to jump if the casing appears cracked, leaking fluid, corroded, or frozen—a frozen battery can explode when subjected to current. AAA technicians warn that frozen batteries pose immediate explosion risks and require professional towing instead.
Lead-acid batteries emit explosive hydrogen gas during charging and discharging. Never smoke or use open flames near batteries. Ensure clamps do not touch each other or any vehicle during connection to prevent sparks that could ignite accumulated gases.
Connection Safety
Keep both vehicles completely off during cable attachment—no idling engines. Ensure cables and clamps remain separated and do not dangle into engine fans or belts. Verify firm connections at each step before proceeding to the next terminal. For a detailed visual walkthrough, refer to the How to Jump Start a Car with Leads – Step-by-Step Safety Guide.
How Long to Leave Jumper Cables Connected and What If It Doesn’t Work?
Optimal Charging Duration
Patience prevents repeated failures. After connecting cables properly, start the donor car and allow it to idle for one to two minutes before attempting to start the disabled vehicle. This waiting period transfers sufficient surface charge to the depleted battery. Once the dead car starts, leave cables connected momentarily to stabilize the electrical system.
More related posts
 Things to Do in Mayo: Top Attractions & Hidden Gems
 Atlantic Flight Training Academy (AFTA) Cost & Pilot Career Guide
 Snow and Rock Dublin: Dundrum Closed, Reviews & Ski Gear
 Best Kaiserschmarrn Near Me: Vienna, London & Insider Tips
 1 Euro to PHP: Live Rate & Best Conversion Tips
 Toyota RAV4 Price List Ireland: New, Used & Best Years
 How to Make Yogurt at Home: Easy Step-by-Step Guide with Tips
 What to Wear to a Funeral: Dress Code for Men & Women